How to Remove Water Rings from Finished Wood Safely
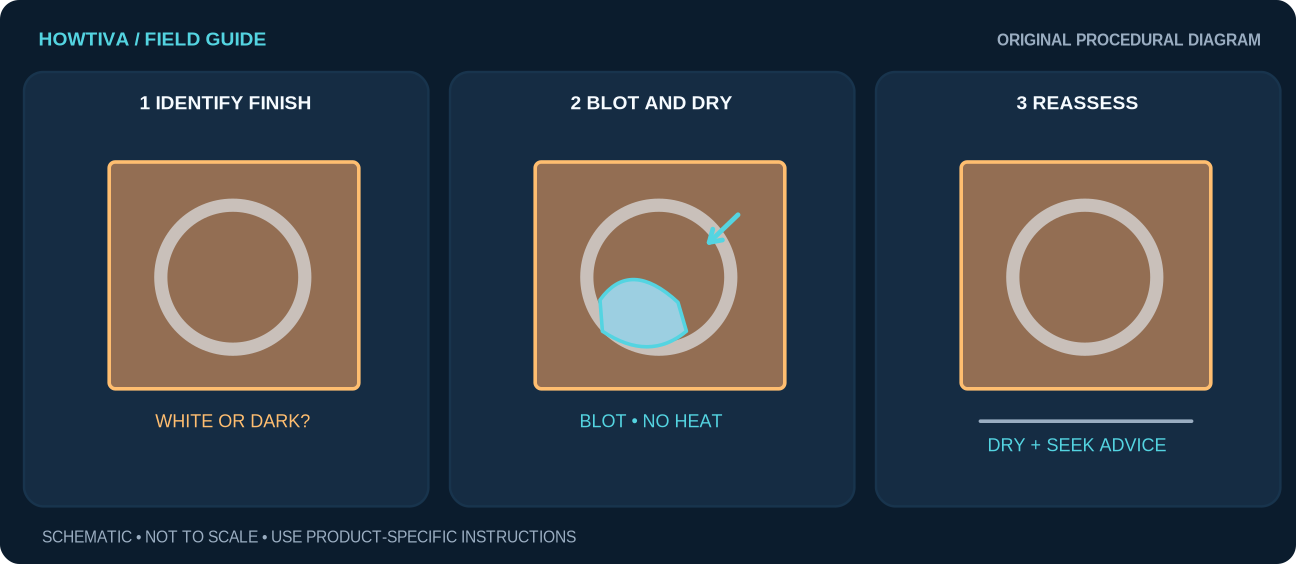
Blot any fresh moisture immediately, let the furniture dry in a normally ventilated room and identify the finish before trying a stain-removal product.
Quick answer: Blot any fresh moisture immediately, let the furniture dry in a normally ventilated room and identify the finish before trying a stain-removal product. A faint white haze may be moisture in the finish; a dark ring may have reached the wood. Start with dry soft cleaning and the furniture maker’s approved care method. Avoid irons, hairdryers, mayonnaise, abrasive polish and aggressive chemicals on unknown finishes.
For finished indoor wood tables and cabinets with a sound surface. Not for raw wood, antiques with fragile shellac, wax-only finishes, veneer lifting, lacquer cracking, painted wood or irreplaceable heirlooms. If the coating is sticky, crazed or flaking, repeated treatment can cause permanent harm.
Before you begin: safety and materials
What you need:
- Dry soft lint-free cloth and good indirect light
- Details of furniture finish and maker care guide, if available
- Coaster or placemat to prevent new rings
- Optional finish-safe cleaner explicitly approved for that piece, used only as labelled
Step-by-step instructions
Step 1: Remove water and take a baseline photo
Lift the glass or vase straight up; blot the liquid without rubbing grit into the finish. Photograph the ring with its color and location. Do not scrape the affected area with a fingernail, razor or melamine sponge.
Step 2: Tell a surface ring from possible deeper damage
Look at the ring in oblique light. General Finishes explains that white marks often sit within the finish and dark marks may indicate moisture in the wood, while warning that some watermarks cannot be removed. The color is a clue—not a guarantee about the coating chemistry.
Step 3: Let the surface normalize gently
Keep the furniture at ordinary indoor temperature with airflow and no standing water. Do not apply concentrated direct heat or place it next to a radiator. Avoid an iron through a towel or a hairdryer “hack”; finish type and heat sensitivity vary.
Step 4: Use only approved gentle maintenance
Where the furniture instructions specify a mild water-damp cleaning cloth, use barely damp clean cloth and dry immediately. For wax, oil, varnish, polyurethane, shellac or lacquer, follow the exact maker’s requirements rather than assuming one furniture-polish formula suits them all.
Step 5: Reassess before any product or repair
If the ring remains after normal drying, stop before sanding, stripping, bleaching or home-remedy soaking. Ask the furniture maker or a finisher who can identify the finish and advise whether the coating can be restored locally or professionally.
Step 6: Prevent repeat moisture damage
Use absorbent coasters, waterproof mats beneath plants and a clean dry cloth after spills. Check the bottoms of planters and cold drink glasses for condensation that migrates into seams or end grain.
Practical examples: how the steps change
A pale circle under a cold water glass
Condensation may cloud an otherwise intact finish. After blotting, give the surface time to dry at room temperature before deciding it needs treatment. Do not apply hot steam or oil just because a video showed it.
Blackish ring beneath an overwatered plant
The water may have penetrated below the clear coat and affected timber. A superficial polish may change sheen without removing the mark; a finisher can assess moisture and veneer risk.
Troubleshooting the problems people actually encounter
The pale ring is unchanged: A finish defect may require professional assessment. Do not repeat random oil, alcohol or acid treatments.
The surface feels sticky: Stop touching and adding products; some old coatings are sensitive to solvents and heat.
The grain appears raised or veneer bubbles: This is material damage rather than a removable surface ring. Keep dry and seek furniture restoration advice.
The spot becomes shinier than surrounding wood: You may be polishing an isolated area and changing the finish sheen. Stop rubbing.
Alternatives, product differences and limitations
When a finish manufacturer authorizes a specific ring-removal product, test according to its directions on a discreet area first; professional intervention is preferred for uncertain antique or high-value items. General Finishes describes more aggressive renovation methods but those belong to experienced finishers, not this safe routine.
When to stop and seek qualified help
Stop for dark spreading marks, lifted veneer, swelling, flaking coating, historic finishes or any attempt involving bleaching agents, chemical stripping, heat guns or sanding old coatings. Some rings are not safely removable with DIY care.
Frequently asked questions
Is a white ring easier to remove than a dark one?
White can indicate a finish-level problem and dark may indicate moisture in wood, but both depend on finish type and condition. Neither is guaranteed to disappear.
Can I iron a water ring out through a towel?
Avoid it without specific finish-manufacturer approval: heat can soften, blister or cloud some coatings.
Sources & further reading
-
General Finishes: Furniture Maintenance and Repair
-
General Finishes: Repairing and Troubleshooting Water-Based Finishes
Use the checklists as you go, and confirm the result before moving on to a more involved repair.